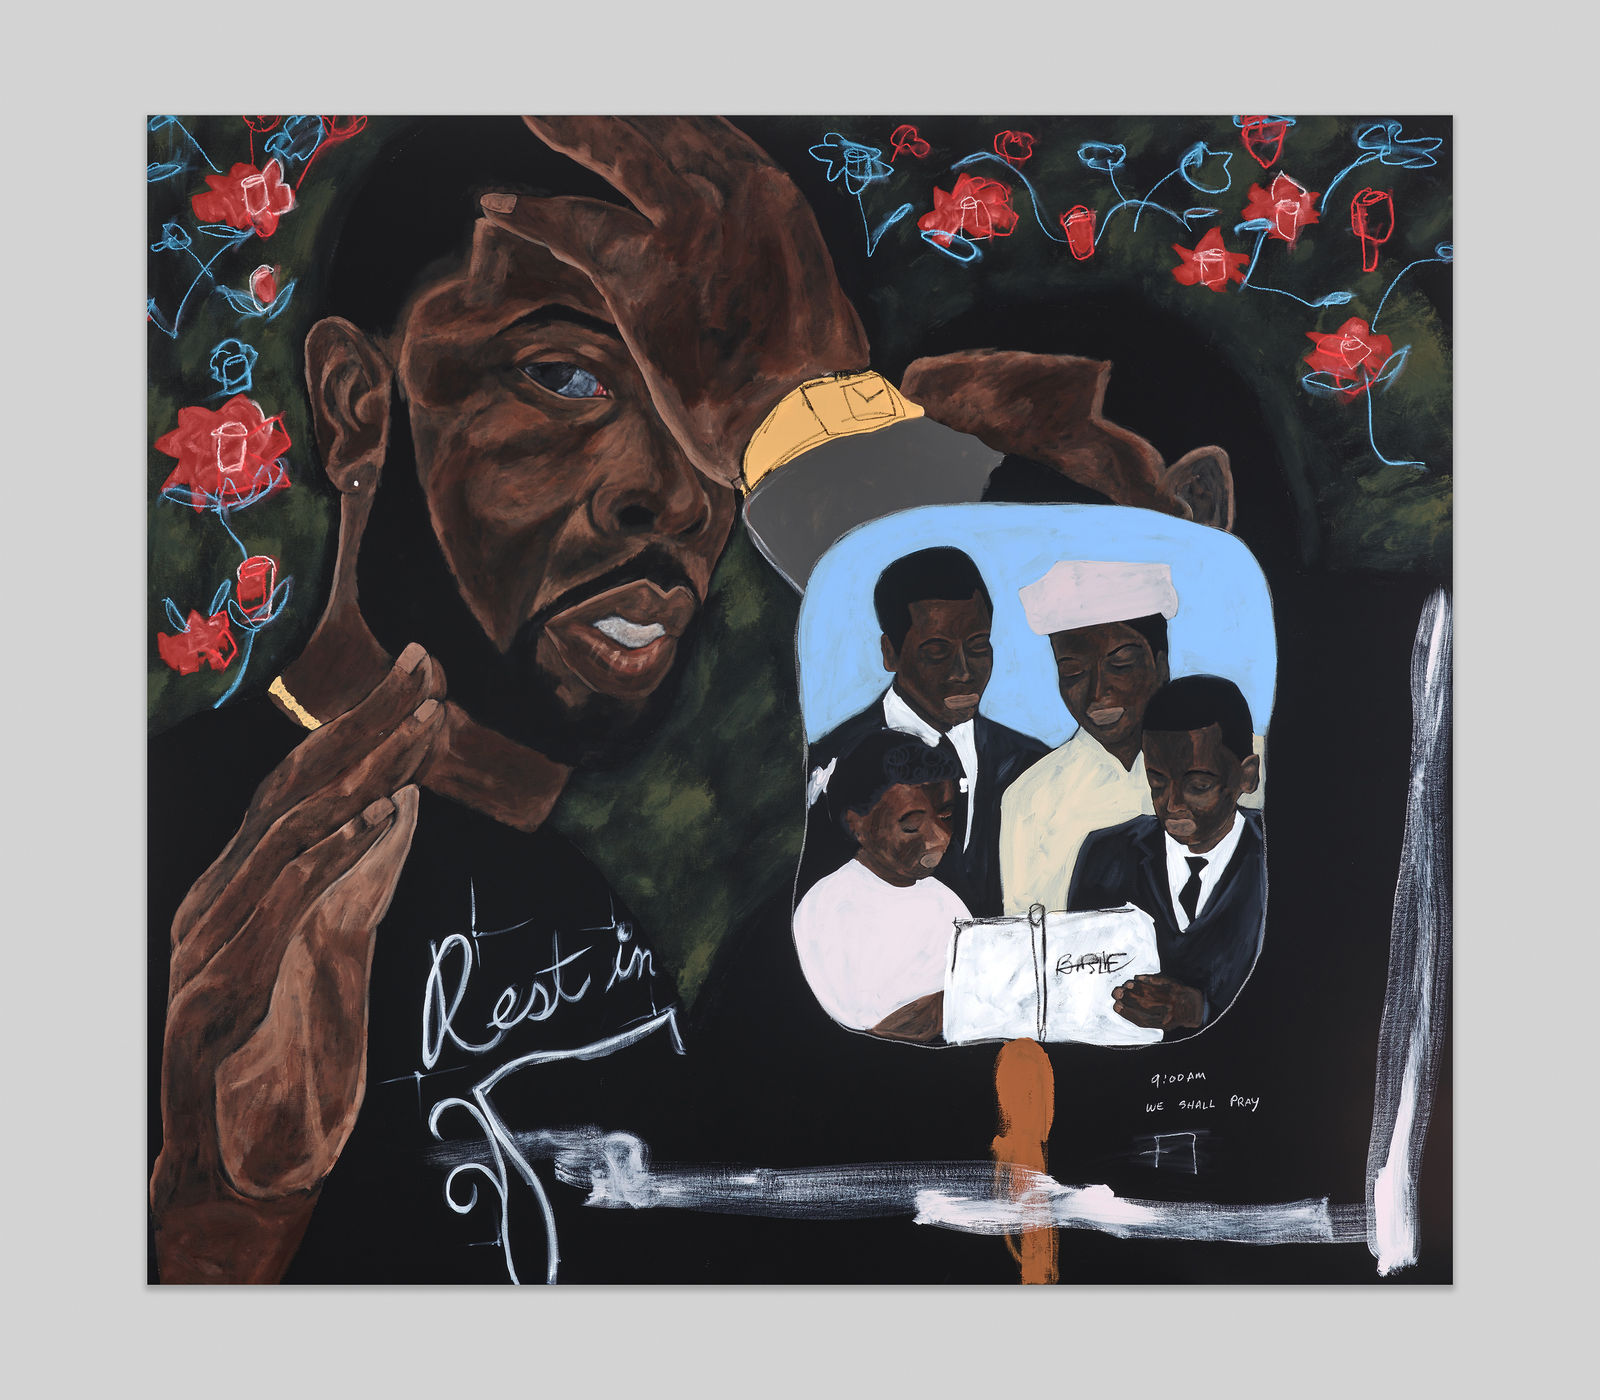
![Jammie Holmes, Blame The Man #2, 2021](https://artlogic-res.cloudinary.com/w_1600,h_1600,c_limit,f_auto,fl_lossy,q_auto/artlogicstorage/boeskygallery/images/view/14ee6719bfcbb46621f3fe040e5c5a40j/marianneboeskygallery-jammie-holmes-blame-the-man-2-2021.jpg)
![Jammie Holmes, Blame The Man #2, 2021](https://artlogic-res.cloudinary.com/w_1600,h_1600,c_limit,f_auto,fl_lossy,q_auto/artlogicstorage/boeskygallery/images/view/ec65e58a82c831a190478b4e76d27b1dj/marianneboeskygallery-jammie-holmes-blame-the-man-2-2021.jpg)
![Jammie Holmes, Blame The Man #2, 2021](https://artlogic-res.cloudinary.com/w_1600,h_1600,c_limit,f_auto,fl_lossy,q_auto/artlogicstorage/boeskygallery/images/view/53dfd0304ec6e83a394e33fe924d2e18j/marianneboeskygallery-jammie-holmes-blame-the-man-2-2021.jpg)
![Jammie Holmes, Blame The Man #2, 2021](https://artlogic-res.cloudinary.com/w_1600,h_1600,c_limit,f_auto,fl_lossy,q_auto/artlogicstorage/boeskygallery/images/view/8bf056700eafdb826cb893c907bbbab2j/marianneboeskygallery-jammie-holmes-blame-the-man-2-2021.jpg)
Jammie Holmes
Blame The Man #2, 2021
Acrylic and oil pastel on canvas
69 7/8 x 78 1/4 x 1 1/4 inches
177.5 x 198.8 x 3.2 cm
JHO.18817
© Jammie Holmes
%3Cdiv%20class%3D%22artist%22%3EJammie%20Holmes%3C/div%3E%3Cdiv%20class%3D%22title_and_year%22%3E%3Cspan%20class%3D%22title_and_year_title%22%3EBlame%20The%20Man%20%232%3C/span%3E%2C%20%3Cspan%20class%3D%22title_and_year_year%22%3E2021%3C/span%3E%3C/div%3E%3Cdiv%20class%3D%22medium%22%3EAcrylic%20and%20oil%20pastel%20on%20canvas%3C/div%3E%3Cdiv%20class%3D%22dimensions%22%3E69%207/8%20x%2078%201/4%20x%201%201/4%20inches%3Cbr/%3E%0A177.5%20x%20198.8%20x%203.2%20cm%3C/div%3E